The purpose of this document is to enumerate the technical steps involved in the integration of Openpay plugin into an existing Prestashop 1.7 installation. The Openpay plugin has been developed for Prestashop versions 1.7.0.0 – 1.7.7.x . Openpay plugin has been tested with the Prestashop version up to 1.7.7.2
Prestashop1.7 Installation
If Prestashop 1.7 is not already installed, this document provides step-by-step instructions to install it:
http://doc.prestashop.com/display/PS17/Installing+PrestaShop
Prestashop1.7 Documentation
This user guide will help you familiarize yourself with PrestaShop’s features:
http://doc.prestashop.com/display/PS17/English+documentation
Openpay integration has following modules:
To install the module, download the zip file.
In Prestashop, all the modules for customizing the online shop are in the folder prestashop/modules.
Follow the steps below:
For the Openpay integration to work, the following needs to be configured in the Backoffice.
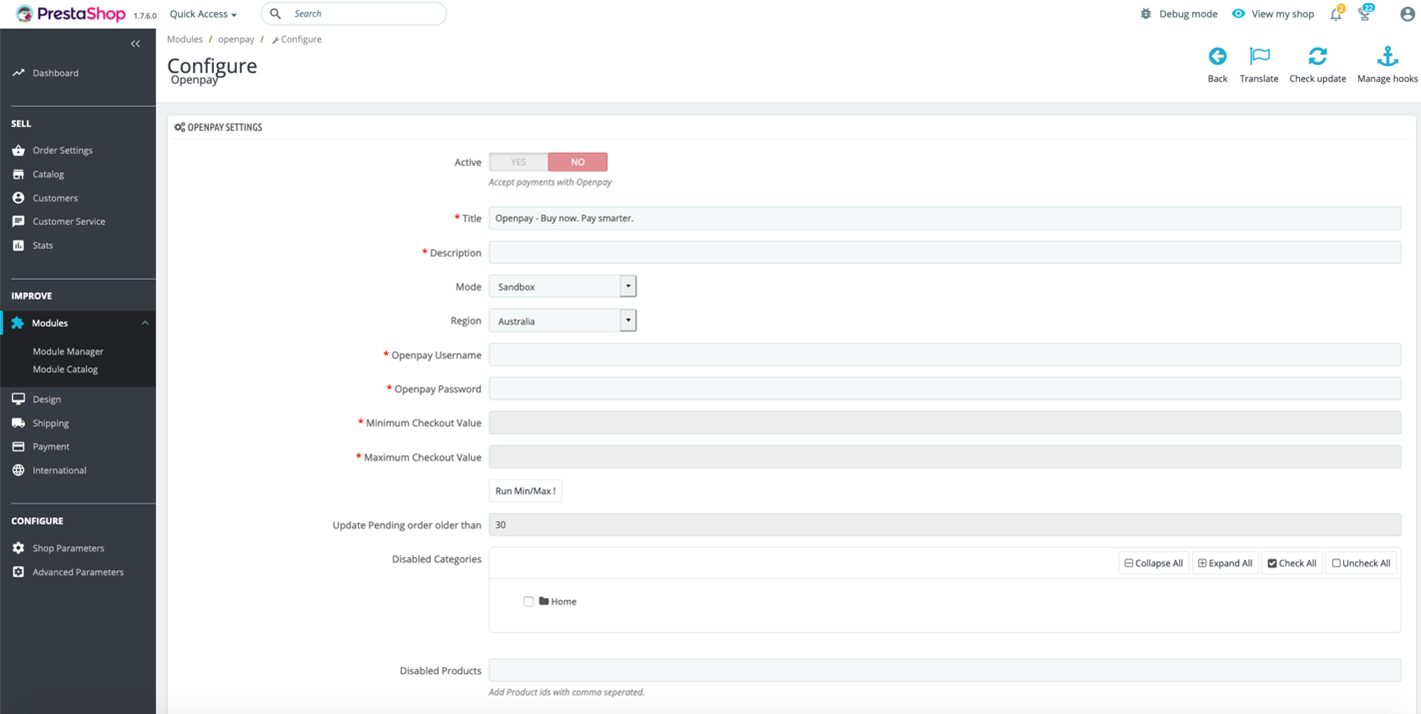
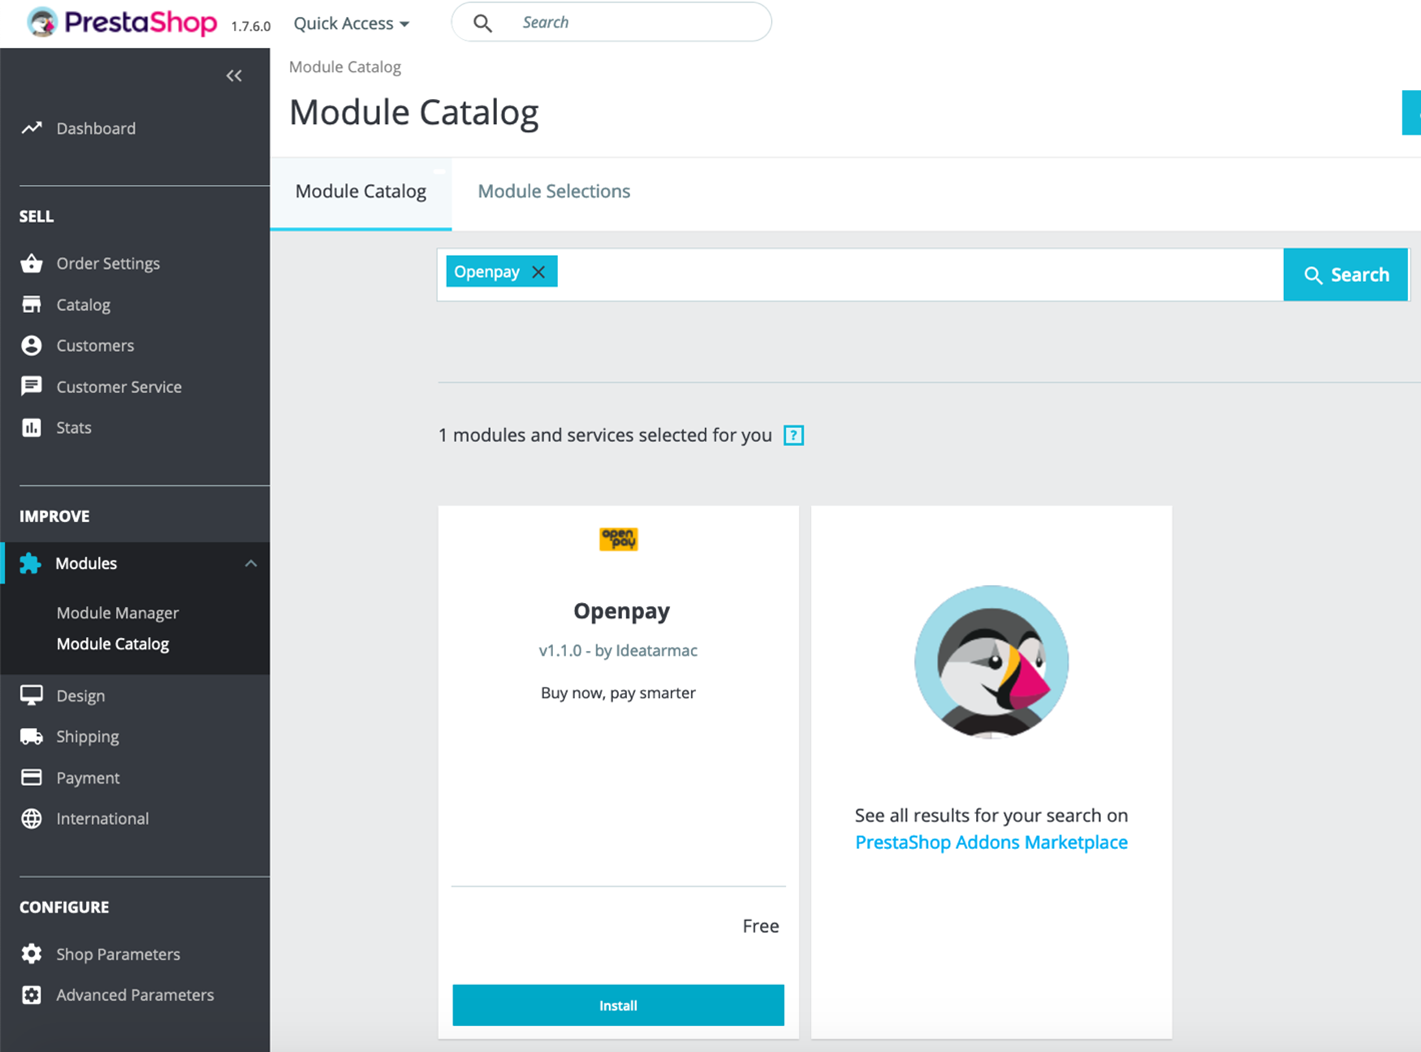
In Menu: Modules – Module Manager all installed Modules are listed. Search ‘Openpay’ and select Configure.
After these integration steps are completed, the refund and checkout features would be functional.
Following are the credentials for the training environment:
This section contains basic set of test cases. Detailed test reports are attached for your reference
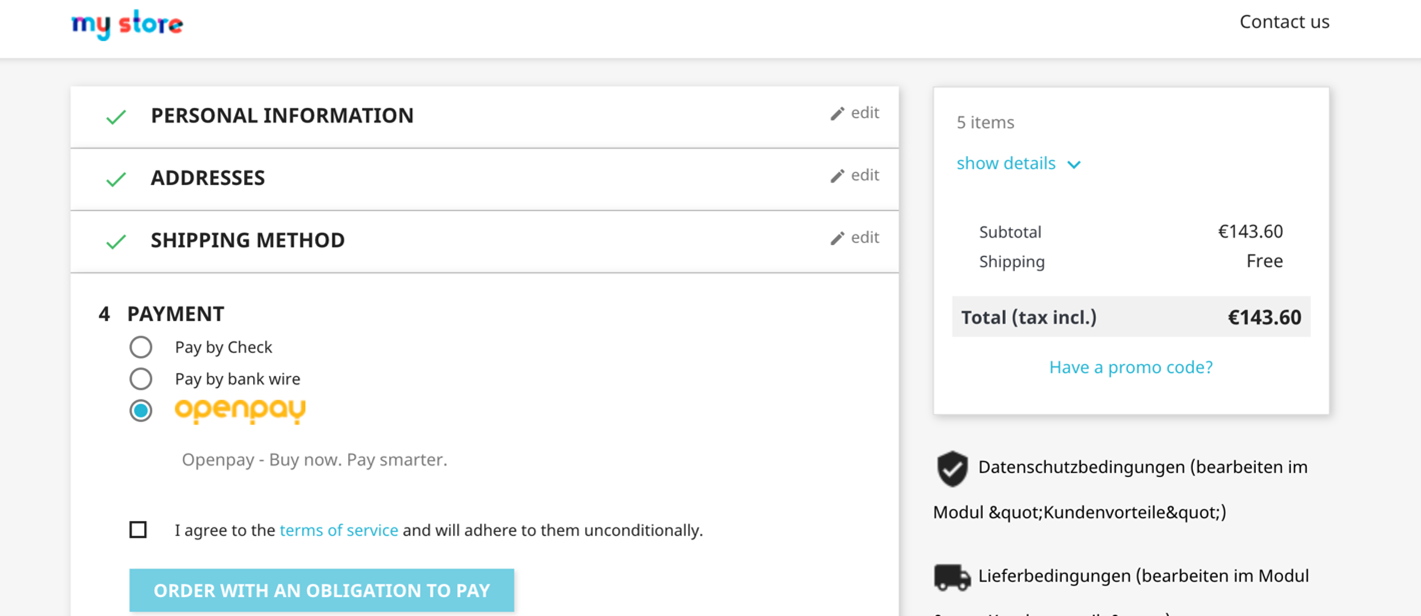
Openpay method would show on the checkout page if the order total falls under the eligible Minimum and Maximum checkout values. After completing the plan in Openpay, the customer is redirected back to the order confirmation screen in Prestashop.
After every refund, you would see a new row with the refunded amount and status in “Openpay – Refund Transaction” section in Order detail page.
After doing the full refund, the Order status should be changed to “Refunded”

Scheduled Jobs can be tested manually by hitting the target link which is configured in Cron task manager in the browser. All orders which have been paid with Openpay and has status “Preparation in progress” status and are older than frequency time, should be changed in “Payment accepted” status or “Canceled”.
[HOST]/[SHOPNAME]/module/openpay/cronlimit
[HOST]/[SHOPNAME]/module/openpay/cronupdatestatus
e.g.
<hostname>/prestashop/en/module/openpay/cronlimit
<hostname>/prestashop/en/module/openpay/cronupdatestatus
The links can be added in every cronjobtool. For example, crontab –e:
More information can be found in: https://wiki.ubuntuusers.de/Cron/
Checkout using Openpay Payment Method
If the customer is already registered with Openpay, the following screen will be displayed:
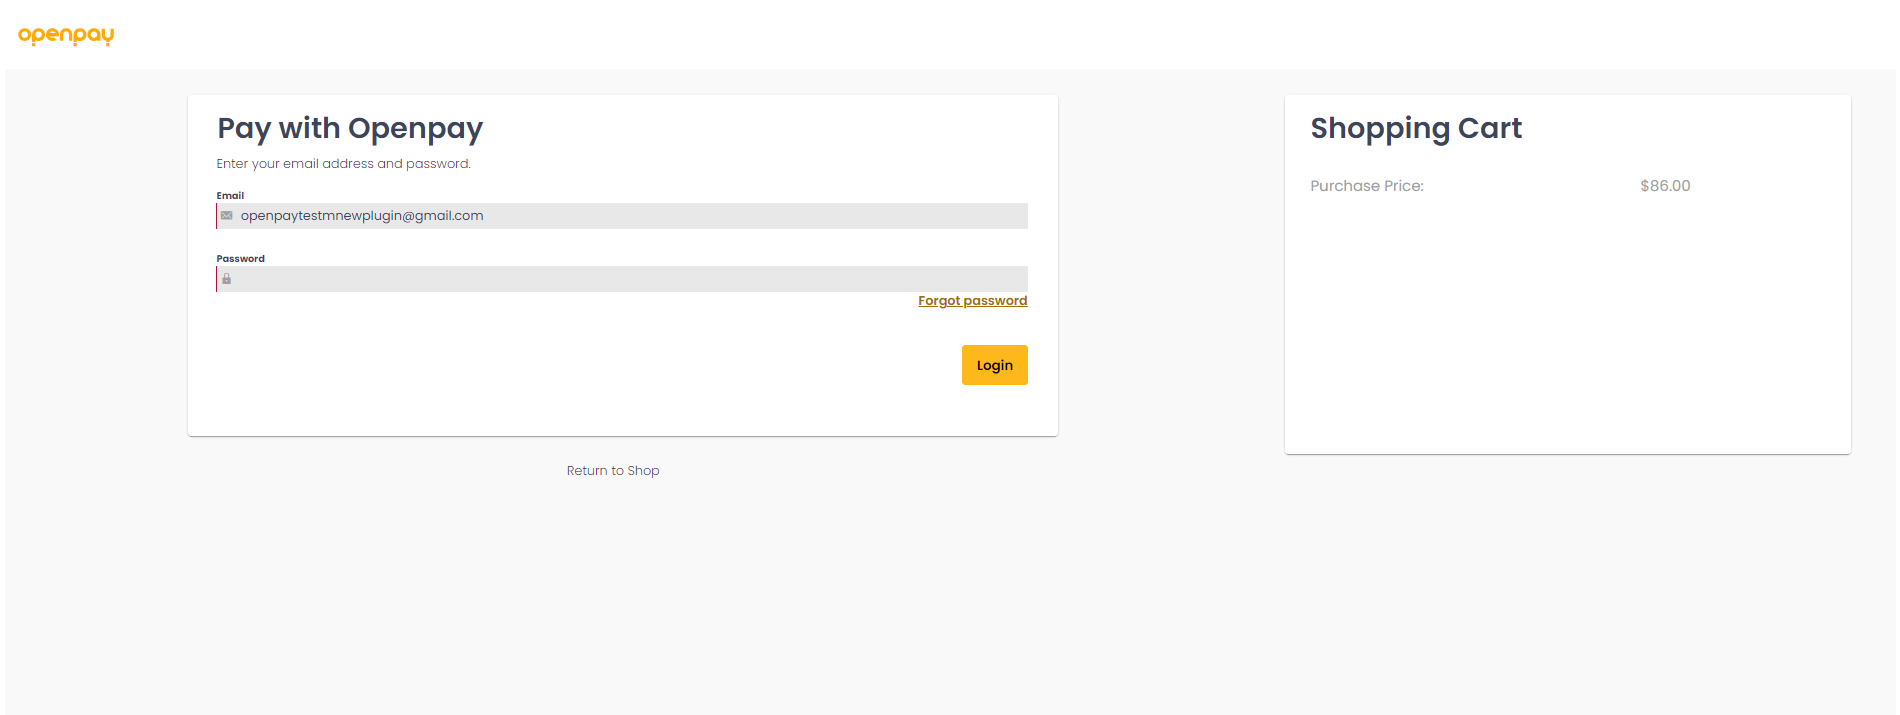
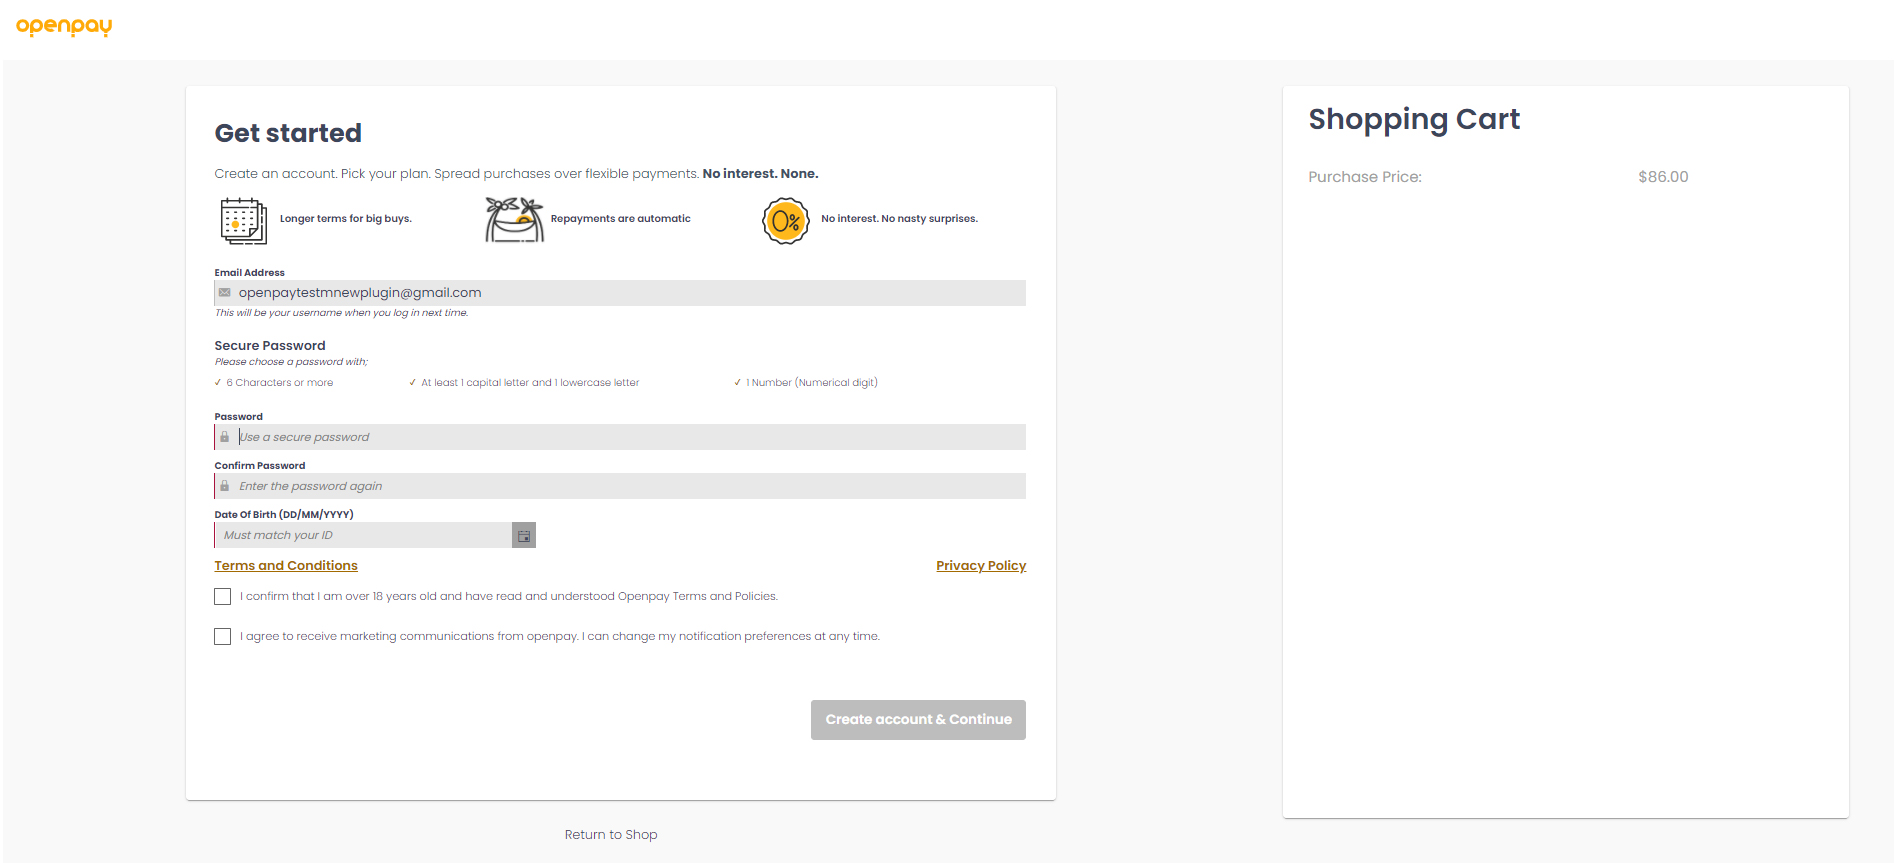
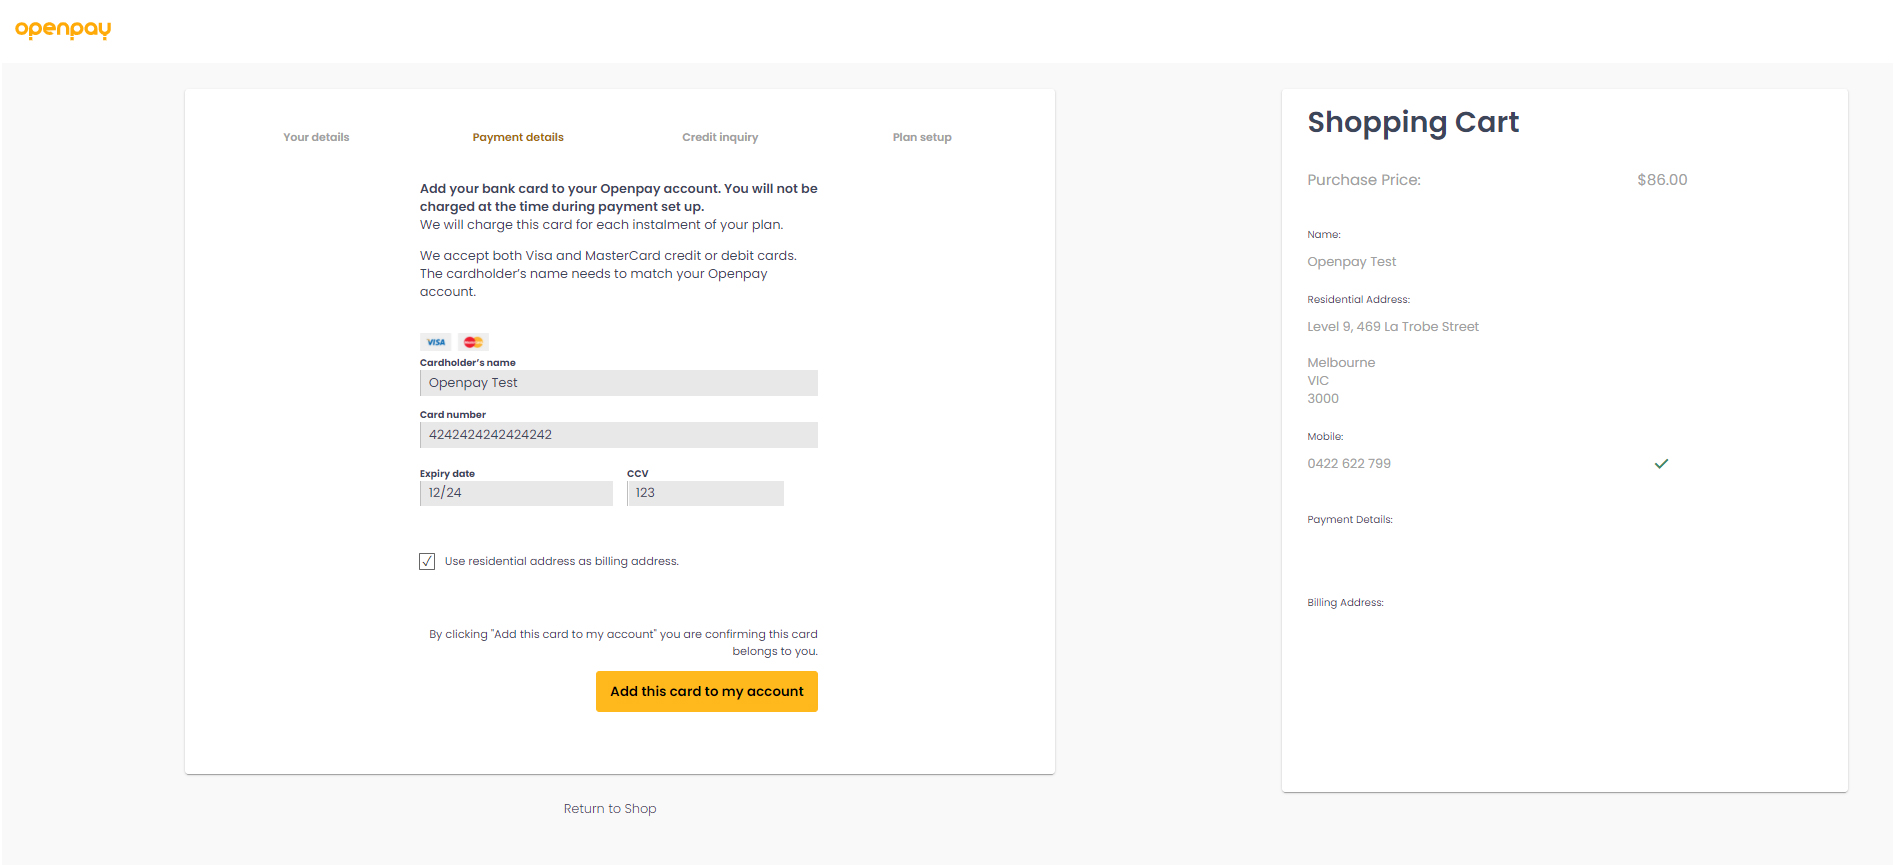
If you do not have an Openpay account, you need to create one.
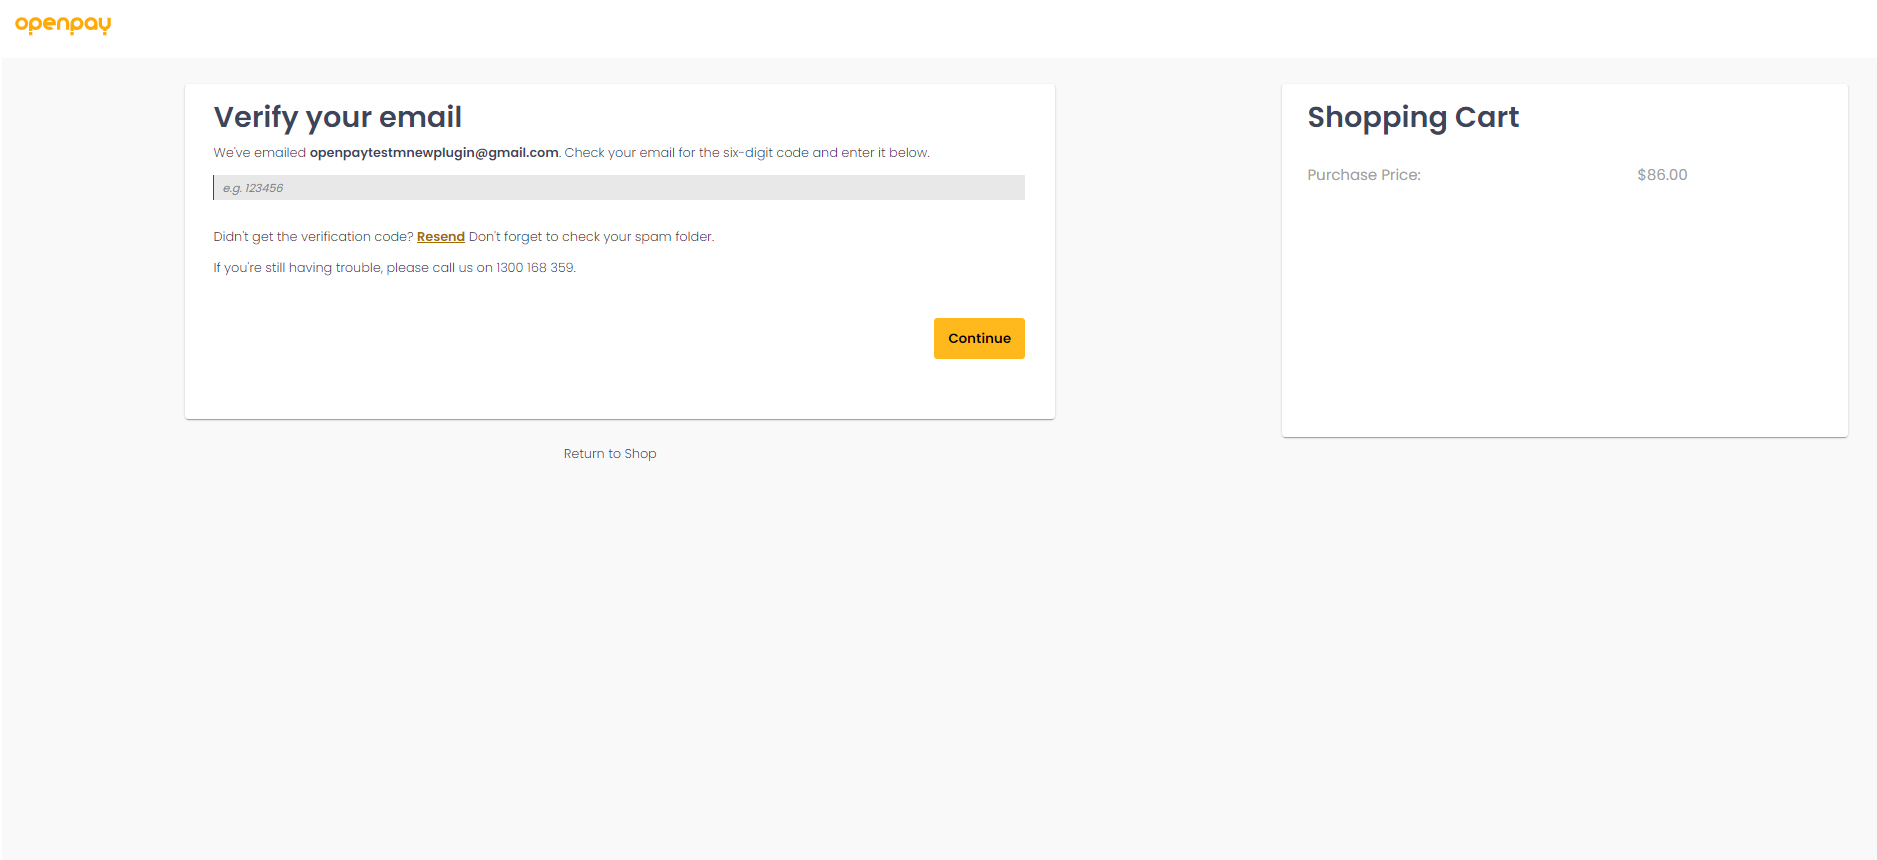
We do not send Email code on training mode please use 123456 for verification.
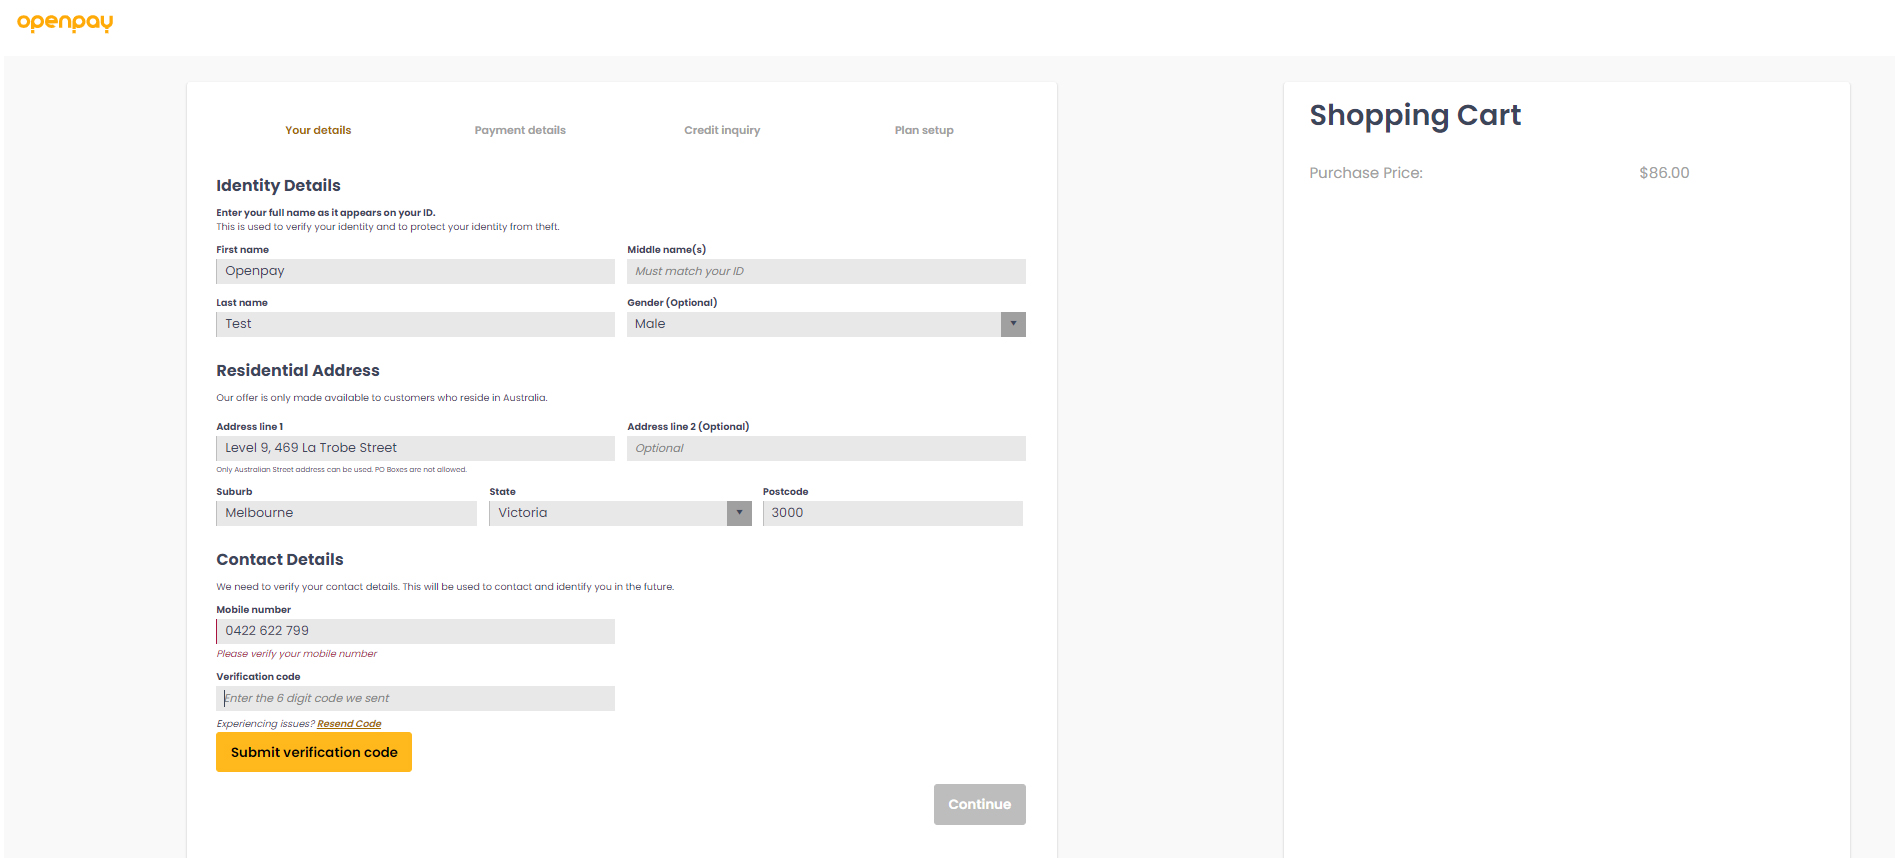
We do not send SMS on training mode please use 111111 for verification.
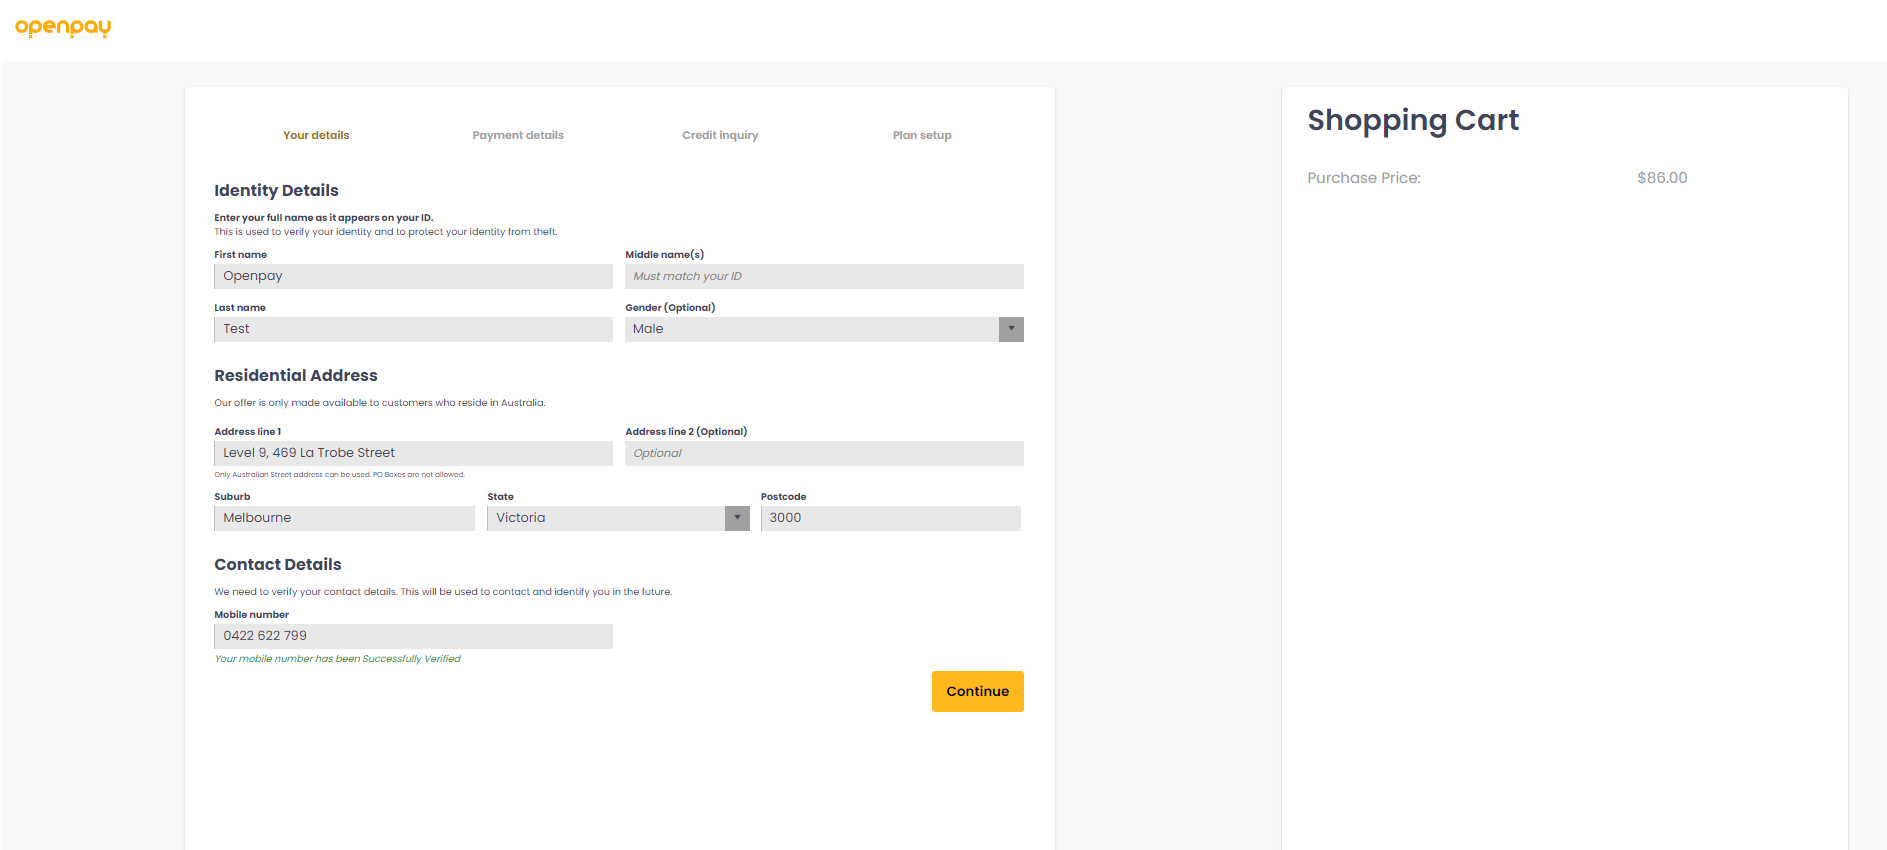
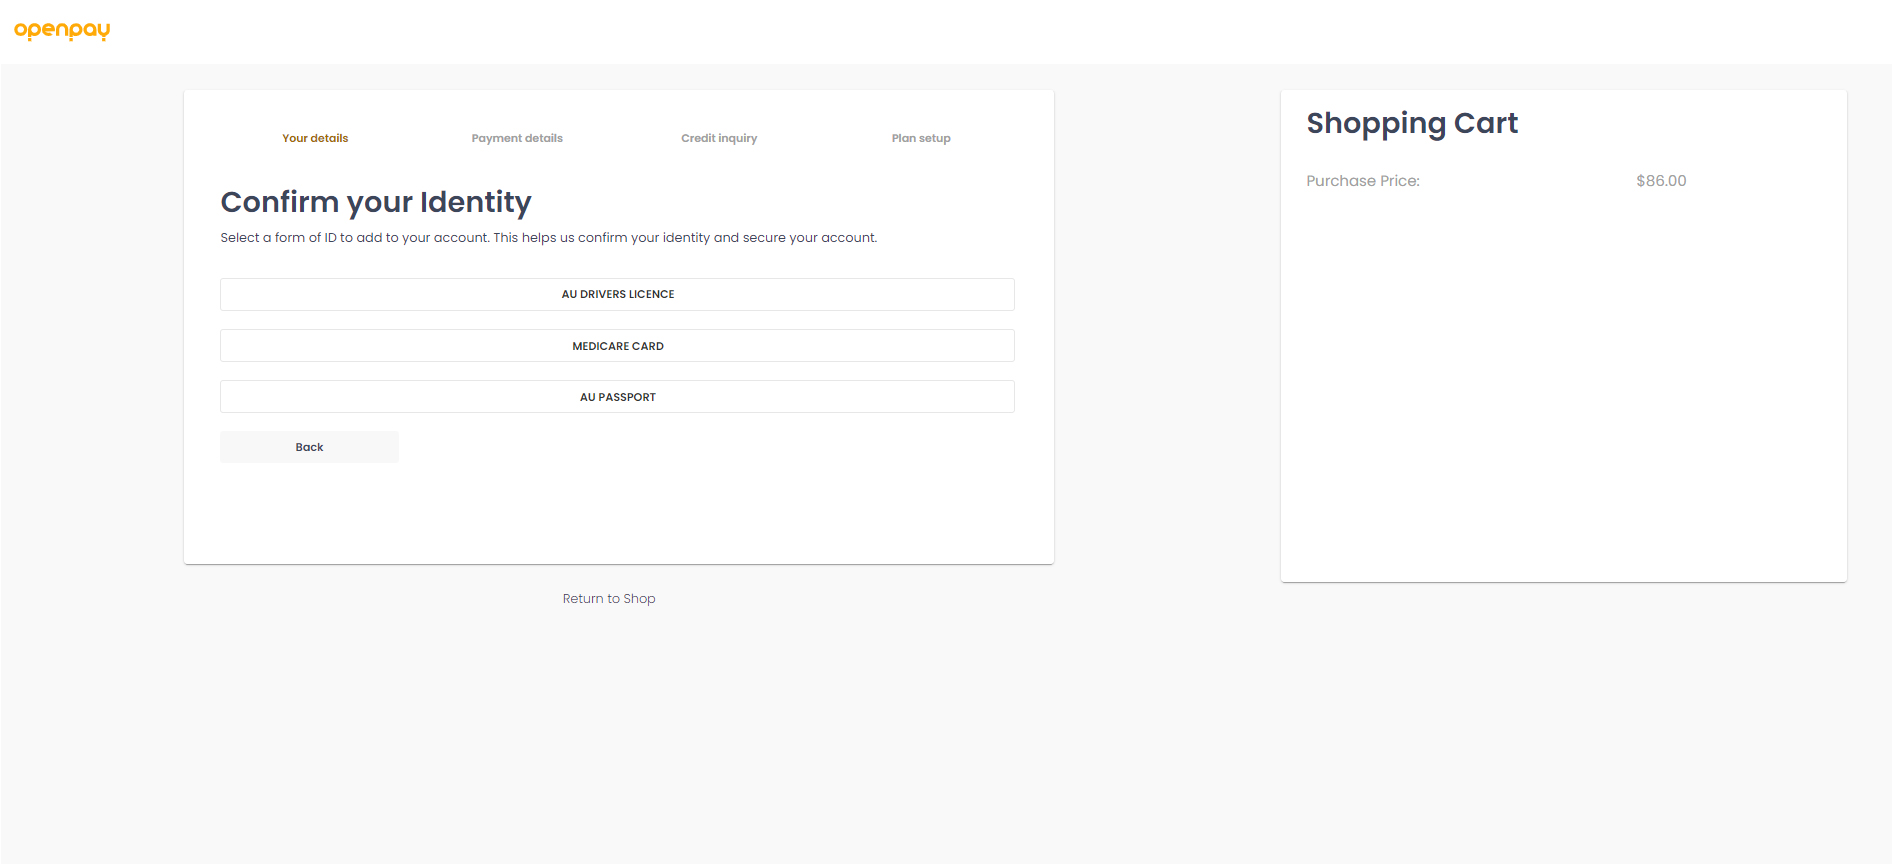
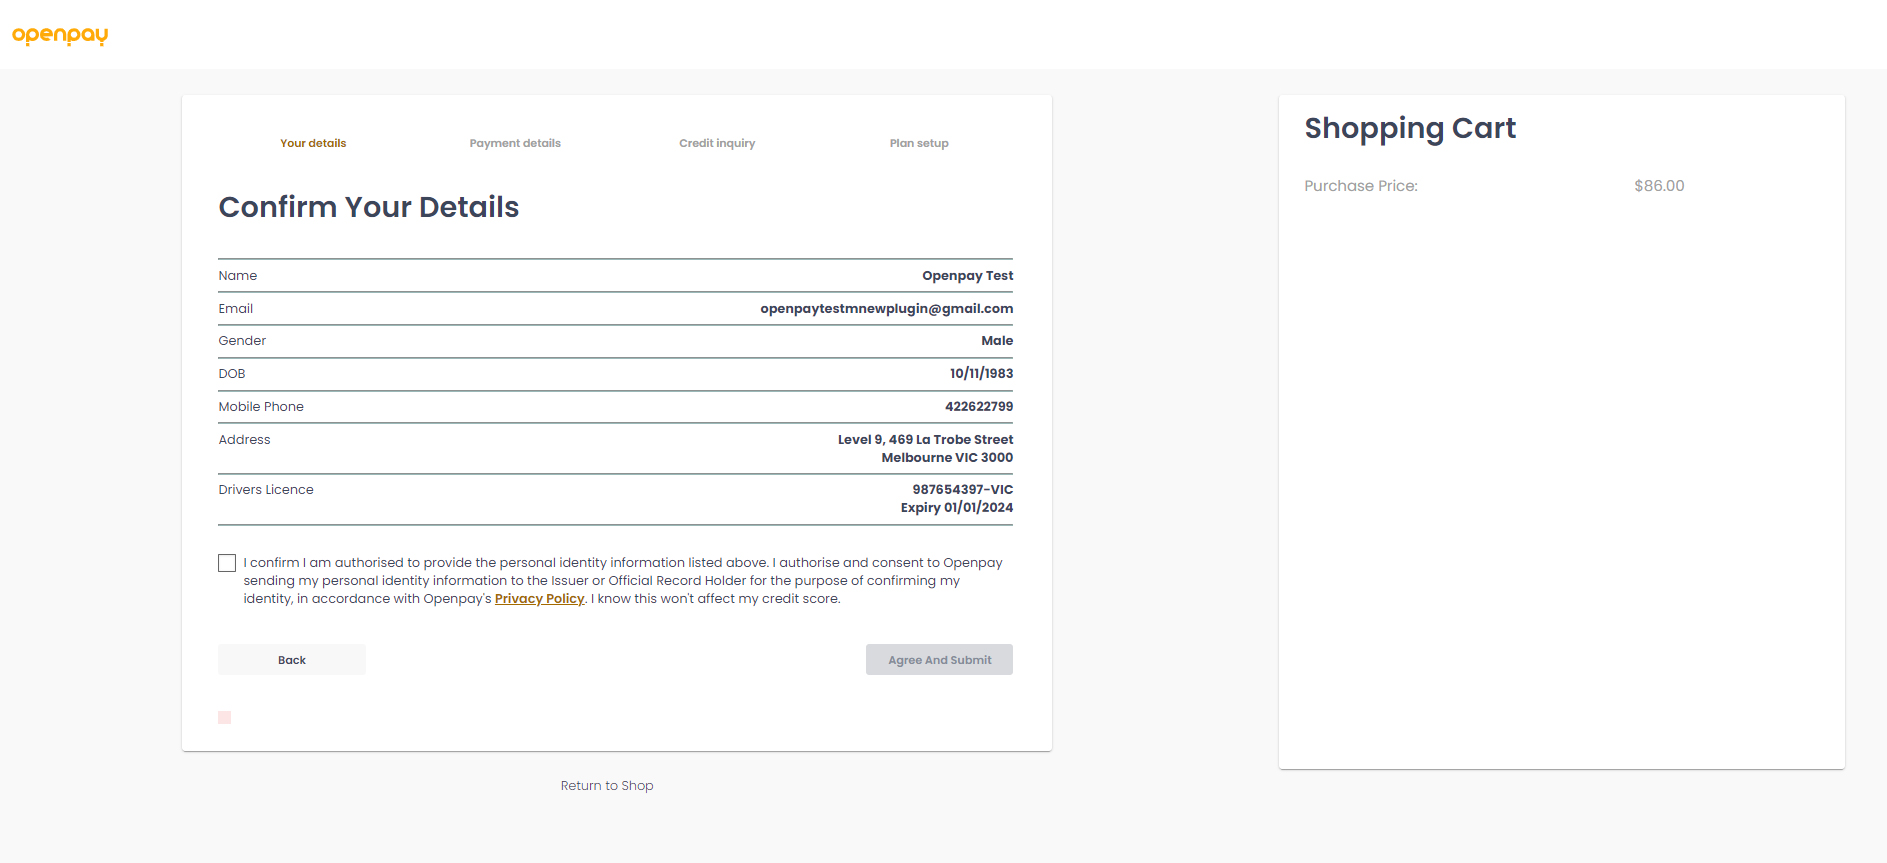
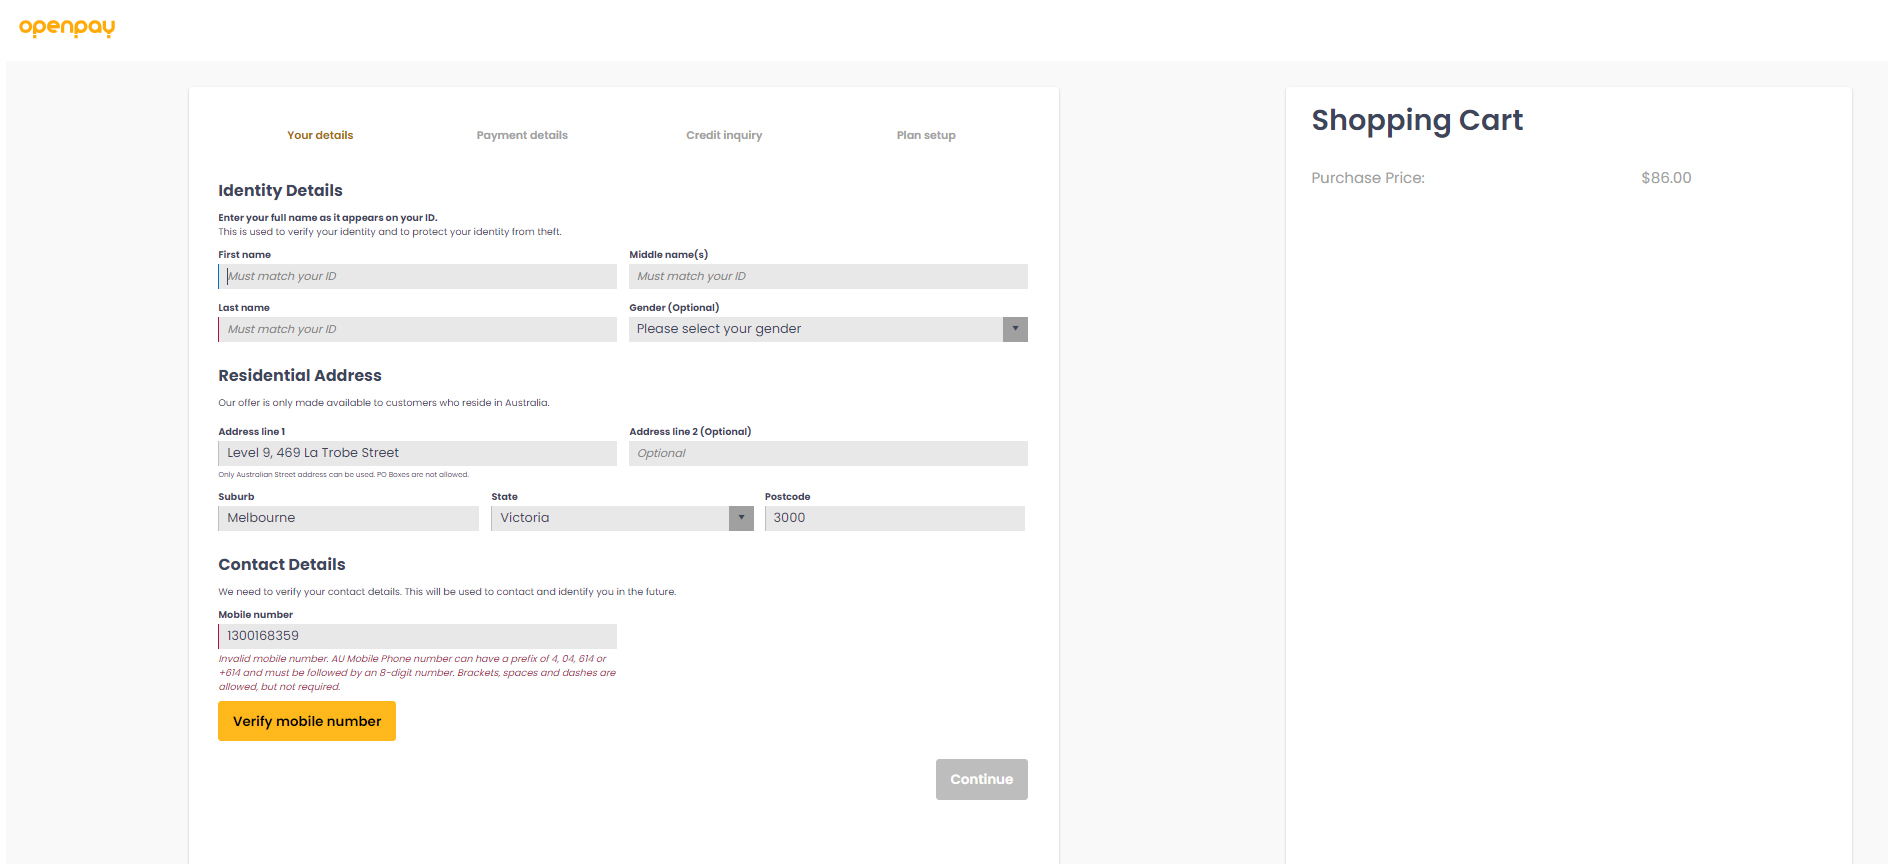
If the customer continues to login, then the following page will be displayed:
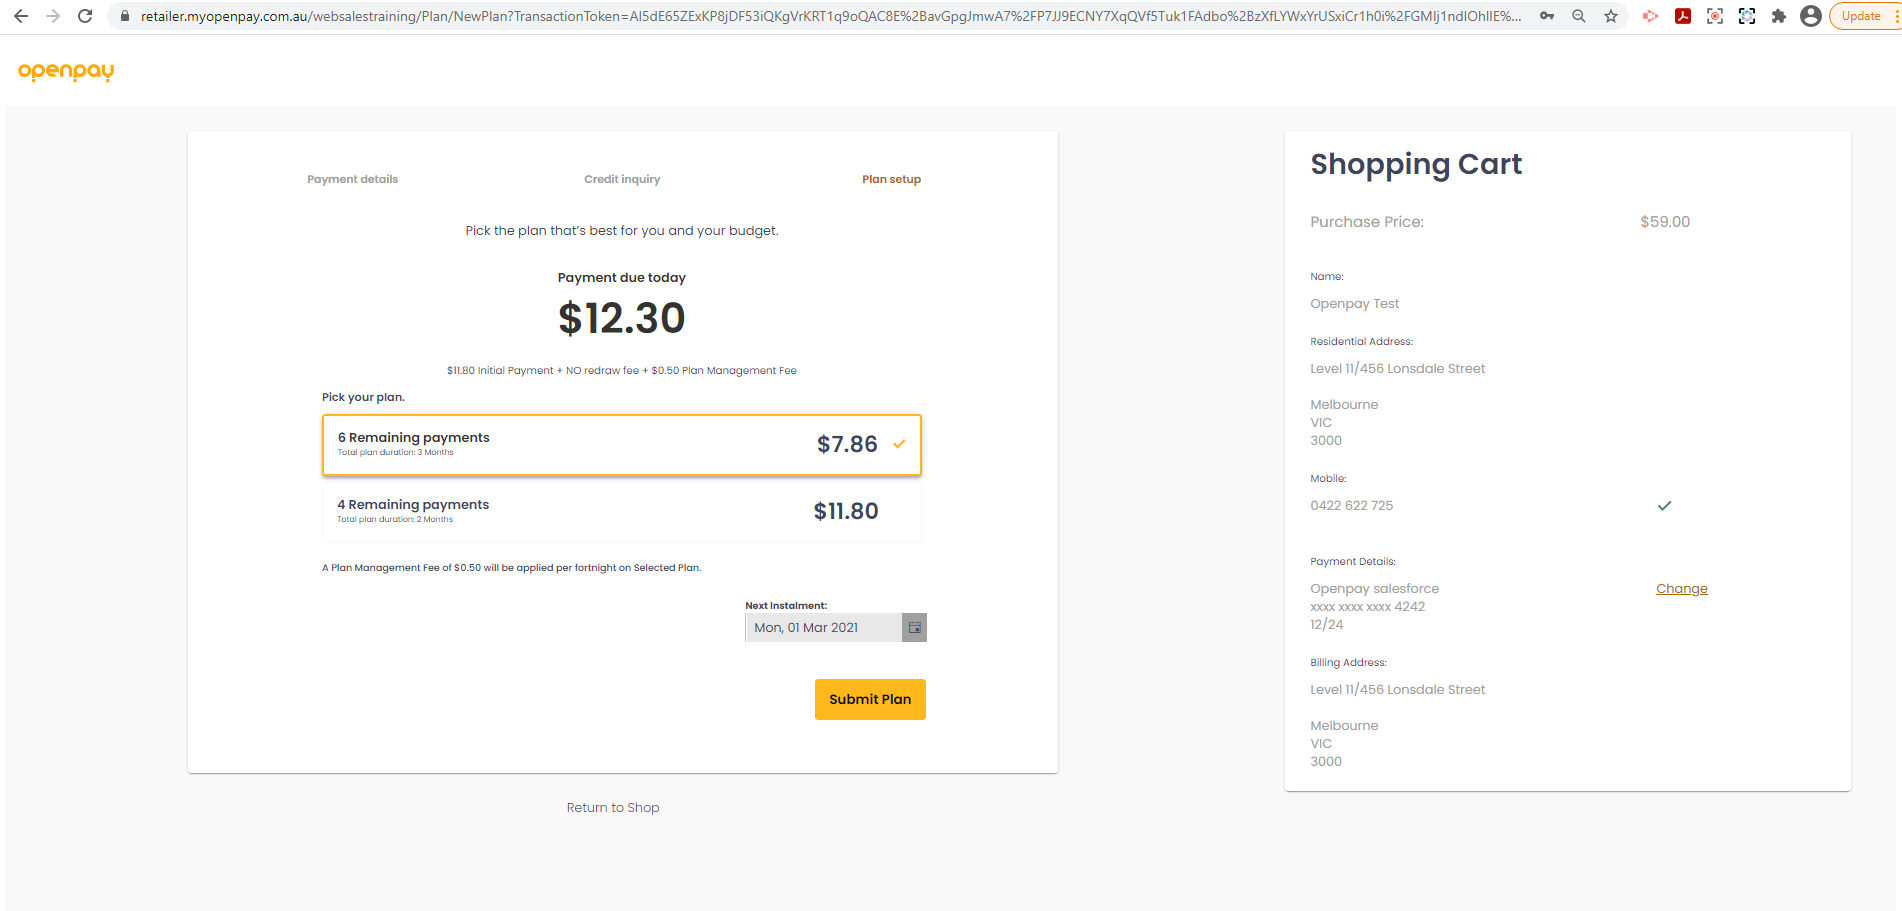
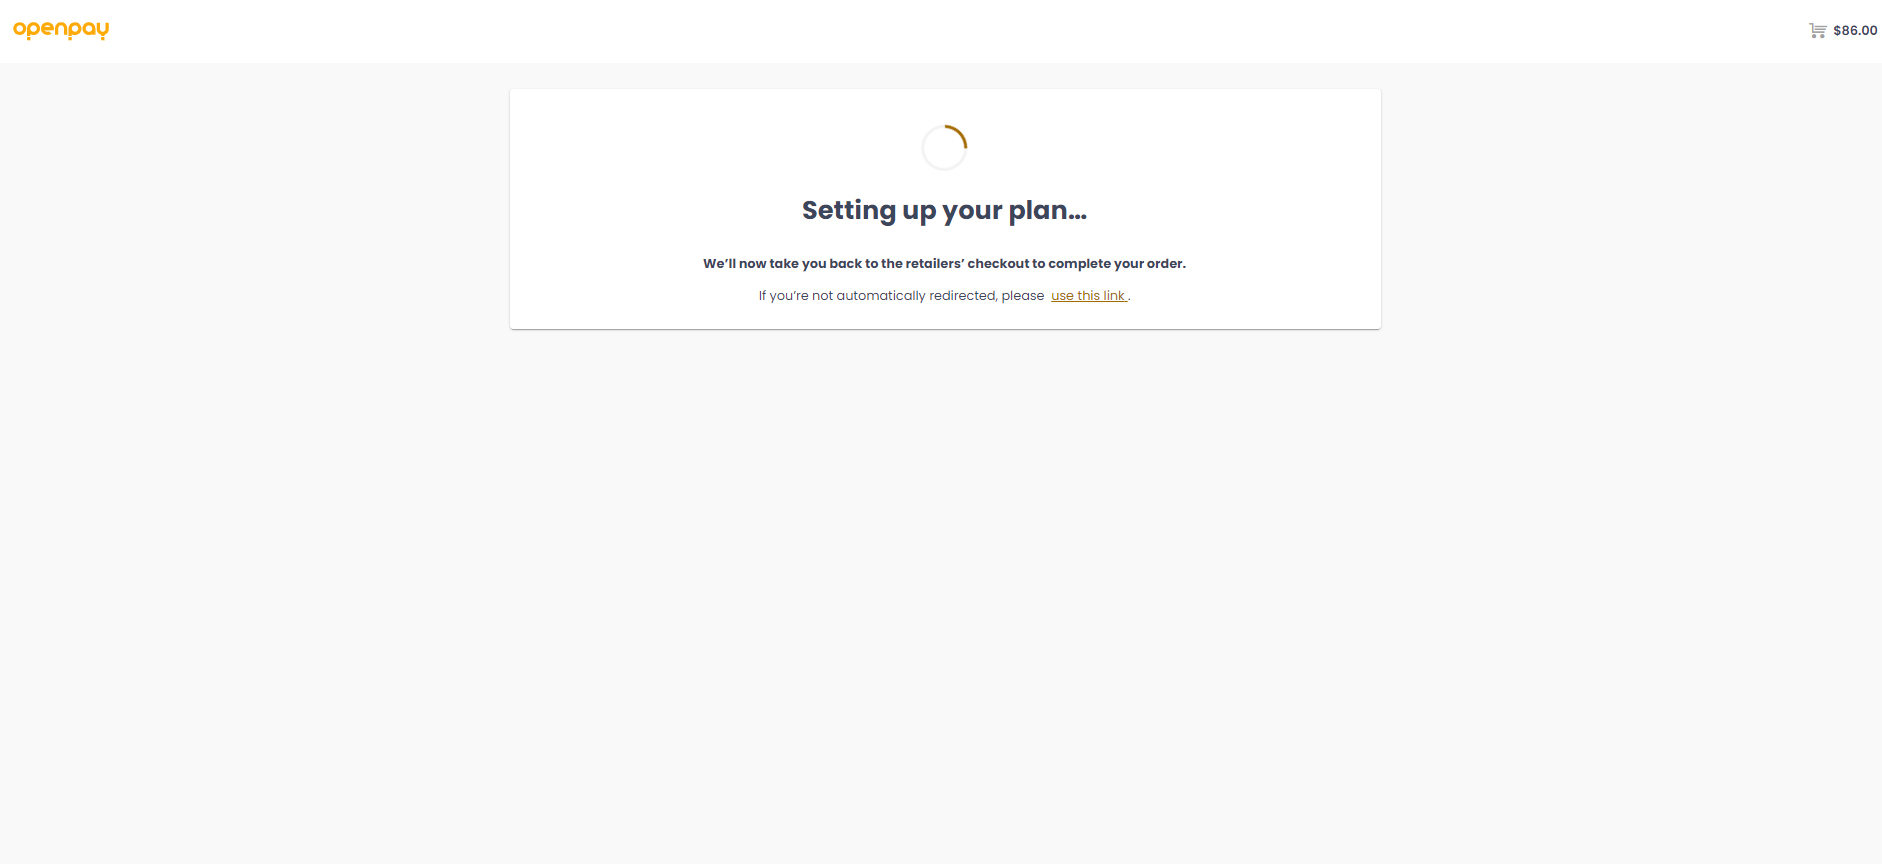
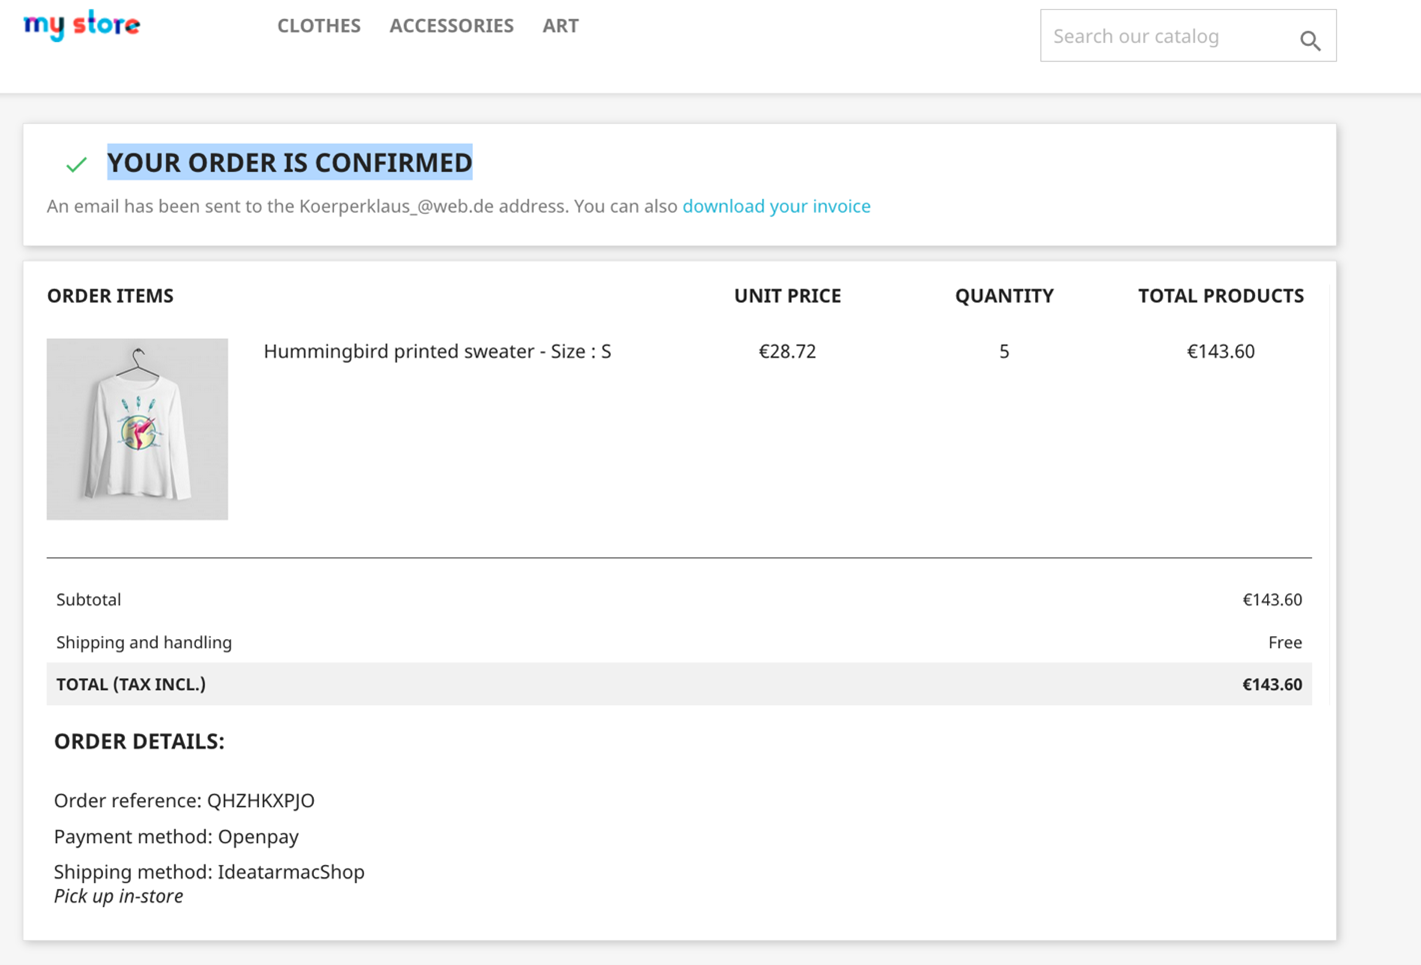
If one clicks on Submit Plan, and the plan is successful, the browser will be redirected to your site with “Your order has been placed” message.
This section provides the credentials for test user and test merchant account on Openpay Training Environment to create and check your Openpay plan.
Openpay Username: 3-521
Openpay Password: 15EE89F2-5D36-4FB4-9ACB-824524F03D2F
Username: AppTestUser@xx.yy
Password: Test123
https://retailer.myopenpay.com.au/training
Username: test_user
Password: Test@123
Please note: Openpay does not provide LIVE / Production test credentials. Our team is happy to test and certify your LIVE / Production site.
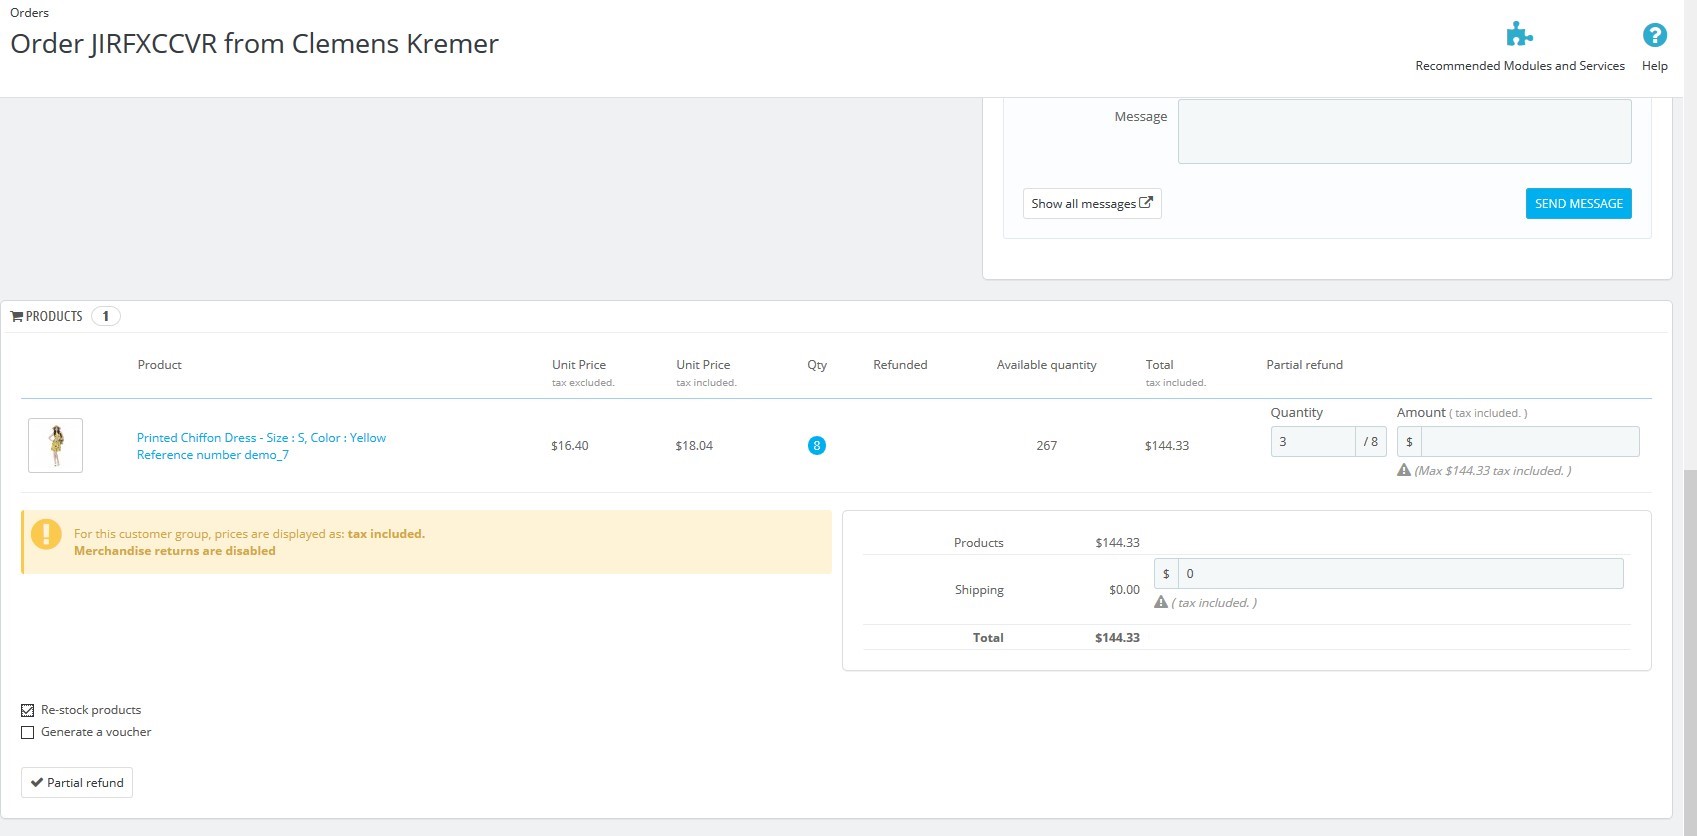
In Prestashop, you can partial and standard refund orders. In this documentation, the refund types are described: http://doc.prestashop.com/display/PS17/Orders
Standard Refund:
Important: “Generate a credit card slip” checkbox must be selected otherwise the Openpay API will not work. If you want to generate a voucher then Openpay API is not called.
If any issue occurs when doing the refund, the message would show in the “Openpay – Refund Transaction” table as shown in the screen below, in this case, please go to the Openpay retailer portal and you can always refund the Openpay plan from there.
Openpay uses custom order status which will be automatically created after installing the module.
Openpay pending status
Customer completes the Openpay form and will be redirected to PrestaShop. If all is fine then the response status is LODGED, order will be placed with order status.
Next Step is to capture the order. If there will be some connection problems or capture will be failed then status will not be changed and order stay in Openpay pending status.
Openpay rejected status
If capture was successful and the order status from Openpay response is not approved then order status will be changed to Openpay rejected status.
Openpay approved status
If capture was successful and order status from Openpay response is approved then order status will be changed to Openpay approved status and can be refunded. Every 30 minutes a job runs and checks the order that are in status Openpay pending status. If returned Openpay order status is Approved and Openpay plan status is Active then order status will be changed to Openpay approved status.
Openpay refunded status
All Orders with status Openpay approved status can be partial and full refunded. If whole amount was refunded then order will be changed to Openpay refunded status.
Canceled
Every 30 minutes a job runs and checks the order that are in status Openpay pending status. If returned Openpay order status is not Approved or returned Openpay plan status is not Active then order status will be changed to status Canceled.
Navigate to Modules > List of modules > Openpay > Configure (dropdown) > Uninstall

| # | Date | Version | Description |
|---|---|---|---|
| 1 | May | 1.0 | Created payment plugin |